Feeds:
Posts
Comments

Where’s Kathlyn???

Hey!  Where did I go?

Pssst…I’m over here – www.bakelikeaninja.com.

Yes, I’ve gone self-hosted.  All the old posts and photos are at the new site, and almost all of the comments made it over too.

To anyone who’s subscribed, my apologies for making you do a do-over.  And, I’ll never make you do it again.  Please visit the new site (which I promise will get less ugly as time goes on.  I promise.  Promise.).

See you soon!

Cheers.

It’s Daring Bakers time again!  And this month…I’m sitting the challenge out.  It was bound to happen some time, and turns out, November 2008 is the time.  I am planning on participating next month, but November was not to be…

Not wanting to disappoint, please check out these other amazing blogs for beautiful incarnations of the Caramel Cake with Caramelized Butter Frosting from Shuna Fish Lydon as published on Bay Area Bites.  And thanks to our ever-resourceful and brave-baking hosts Delores from Chronicles in Culinary Curiosity, Alex from Blondie and Brownie, Jenny of Foray into Food and the amazing Natalie of Gluten-a-Go-Go baking up all those alterna-darers for this challenge.  Right there you’ve got five amazing bloggers to check out, even without my list…what are you waiting for?  Go check them out!  I’ll wait.

Hey, you’re back!  So if that wasn’t enough caramely goodness for you, have a gander at these fine blogs, or head over to the (somewhat daunting) Daring Bakers Blogroll and shoot the entire day checking out however many of the 1000+ spectacular bakers you can (if you decide to join us, you should be able to get in for January).

So without further blathering on, here are a handful of caramel cakes for you to peruse at your leisure.

Use Real Butter
Half Baked
Strawberries in Paris
Whisk
Confessions of a City Eater
Dolce Cakes

And these fine ladies hadn’t posted as of my writing this, but check them out anyway!

A Hot Dish
Chasing Some Blue Sky

Thanks to everyone who participated and shared their experience (I especially love the tips on spun sugar, which I will be attempting myself, stat) – keeping baking into the daring future!

Cheers.

We’re bringing the rolls this year.  Not store bought doughy things, but rustic, crunchy brown rolls.  I’m afraid this may distress my young cousin who seems to have an affinity for soft, white foods, but I saw the rolls in this month’s Cook’s Illustrated and kind of had to make them.

I cheated a little and didn’t use exactly what Cook’s calls for – which is not my usual MO with them as they almost always have a good reason for doing what they do.  But really, we didn’t need 5 lbs of whole wheat flour just to use 3 tablespoons and I also didn’t want to send the husband on the mission of visiting the 15 different stores necessary to actually locate bread flour in Los Angeles.  So these may not be quite up to snuff, flavor-wise.  Even if they are a little vapid, you have to admit, they’re not bad looking!

dinner-rolls-0

And really, with all the food that we’ll be stuffing in our pie holes today as we give thanks for our blessing of abundance, looks do count as muchs as taste.  If they didn’t, would cranberry relish in a can come anywhere near anyone’s home?  These are not the sweet, fluffy white dinner rolls your grandmother burnt every year (oh, wait, I’m getting your grandmother confused with mine), but they are pretty, and crunchy and over-all, quite nice.  If you make them, just don’t skip the whole wheat flour.

Happy Thanksgiving all!

Cheers.

Rustic Dinner Rolls from Cook’s Illustrated

Makes 16 rolls.

Because this dough is sticky, keep your hands well floured when handling it. Use a spray bottle to mist the rolls with water. The rolls will keep for up to 2 days at room temperature stored in a zipper-lock bag. To re-crisp the crust, place the rolls in a 450-degree oven 6 to 8 minutes. The rolls will keep frozen for several months wrapped in foil and placed in a large zipper-lock bag. Thaw the rolls at room temperature and re-crisp using the instructions above.

Instructions

  1. 1. Whisk water, yeast, and honey in bowl of stand mixer until well combined, making sure no honey sticks to bottom of bowl. Add flours and mix on low speed with dough hook until cohesive dough is formed, about 3 minutes. Cover bowl with plastic wrap and let sit at room temperature 30 minutes.
  2. 2. Remove plastic wrap and evenly sprinkle salt over dough. Knead on low speed (speed 2 on KitchenAid) 5 minutes. (If dough creeps up attachment, stop mixer and scrape down using well-floured hands or greased spatula.) Increase speed to medium and continue to knead until dough is smooth and slightly tacky, about 1 minute. If dough is very sticky, add 1 to 2 tablespoons flour and continue mixing 1 minute. Lightly spray 2-quart bowl with nonstick cooking spray; transfer dough to bowl and cover with plastic wrap. Let dough rise in warm, draft-free place until doubled in size, about 1 hour.
  3. 3. Fold dough over itself; rotate bowl quarter turn and fold again. Rotate bowl again and fold once more. Cover with plastic wrap and let rise 30 minutes. Repeat folding, replace plastic wrap, and let dough rise until doubled in volume, about 30 minutes. Spray two 9-inch round cake pans with nonstick cooking spray and set aside.
  4. 4. Transfer dough to floured work surface, sprinkle top with more flour. Using bench scraper, cut dough in half and gently stretch each half into 16-inch cylinders. Divide each cylinder into quarters, then each quarter into 2 pieces (you should have 16 pieces total), and dust top of each piece with more flour. With floured hands, gently pick up each piece and roll in palms to coat with flour, shaking off excess, and place in prepared cake pan. Arrange 8 dough pieces in each cake pan, placing one piece in middle and others around it, with long side of each piece running from center of pan to edge and making sure cut-side faces up. Loosely cover cake pans with plastic wrap and let rolls rise until doubled in size, about 30 minutes (dough is ready when it springs back slowly when pressed lightly with finger). Thirty minutes before baking, adjust rack to middle position and heat oven to 500 degrees.
  5. 5. Remove plastic wrap from cake pans, spray rolls lightly with water, and place in oven. Bake 10 minutes until tops of rolls are brown; remove from oven. Reduce oven temperature to 400 degrees; using kitchen towels or oven mitts, invert rolls from both cake pans onto rimmed baking sheet. When rolls are cool enough to handle, turn right-side up, pull apart, and space evenly on baking sheet. Continue to bake until rolls develop deep golden brown crust and sound hollow when tapped on bottom, 10 to 15 minutes; rotating baking sheet halfway through baking time. Transfer rolls to wire rack and cool to room temperature, about 1 hour.

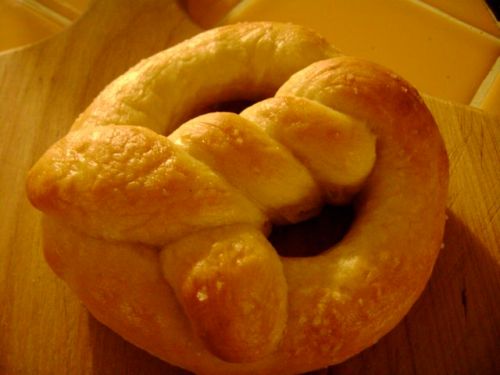
The Daring Bakers, that illustrious and intrepid group of folks world-’round that takes on a monthly challenge de four and posts the results together on the same day is two years old this month.  In honor of this great group (which happens to be the reason I started blogging), I spent part of this afternoon making the very first challenge, homemade pretzels.  Ah, who am I kidding?  The husband wanted them.  But happily his craving for East Coast street food coincides with the anniversary of that great day that Ivonne and Lis started baking together in public…

Without further ado, my sincere and humble nod to the first Daring Bakers

dsc00826

Seriously, Santa, please bring me a decent camera!

But you get the idea.  We chowed down on these with some fine organic yellow mustard from Trader Joe’s and I have to say, they were pretty yummy.  Far better than those things you get at the movies.  Probably no match for the authentic NYC sidewalk stand, but hey, I’ll take “almost as good as sidewalk bought.”  Plus they were fun.  And I’ve never made them before.  And there was beer.

This is a very easy recipe.  Because I’m not going step by step through the recipe like I normally do, I’m going to make my comments up front here.

1. My pretzels were mostly too fat (pictured specimen excepted).  They don’t need to go on a diet, but they do need to rolled thinner.  Also, it took me so long to roll all eight of them, the first four had re-risen by the time the last four were ready for the oven.  My suggestion – either haul ass and roll a lot faster than I do, or bake them in batches.

2. As directed in the recipe, we ate one warm, right out of the oven.  It was very bready, kind of fluffy, definitely not pretzely and rather disappointing.  Thinking I (or possibly my weirdo oven) had flubbed it, we abandoned the pretzels and figured we’d just go for a walk and pick up some beer and nacho cheese to drown our sorrowful pretzels.  They didn’t have any fakin queso at the local liquor store, so we settled for the beer and figured we’d just use extra mustard.  Turns out, the waiting is the hardest part, but it’s also the most helpful part.  Waiting about an hour made the pretzels…more like pretzels.  I don’t know how exactly to explain it, but letting them sit around definitely improved the little guys.  And that’s not just the beer talkin.

3. Last but certainly not least, thank you to Lis and Ivonne for starting this fantastic group.  You ladies are wonderful and have done all of us crazy folks who think spun sugar, kitchen scales and pizza stones are more fun than a trip to Disneyland a huge service by making a place to do our thing together, no matter how far apart.  Happy birthday to you and thanks for letting me play.

Cheers.

Hot Buttered Pretzels

Adapted from The King Arthur Flour Baker’s Companion.

For the dough:

  • 2-1/2 cups all-purpose flour
  • 1/2 tsp. salt
  • 1 tsp. sugar
  • 1 package (2-1/4 tsp.) instant yeast
  • 1 cup warm water (you may need a little more)

For the pretzel topping:

  • 1/2 cup warm water
  • 1 tsp. sugar
  • kosher salt
  • 3 tbsp. unsalted butter, melted
  1. Combine all the dough ingredients in a large bowl with your hands. Work the ingredients together until you can form a ball. If the dough is very dry, add a bit more warm water until it comes together. The dough will look messy, but don’t worry about it.
  2. Turn the dough out onto a floured surface and begin kneading by pushing the dough away with the heel of your hand, and then folding it back in onto itself. Push the dough away again and then fold back in. Continue this motion, working the dough until it’s smooth. This should take anywhere from 8 to 10 minutes. (Alternatively, you can knead the dough in a mixer with your dough hook for 5 to 6 minutes).
  3. Once the dough is done, sprinkle some flour on the dough and put it in a large, oiled bowl. Cover loosely with plastic wrap and let the dough rest for 30 minutes to an hour. It will rise considerably.
  4. Preheat the oven to 500 degrees F. and line two baking sheets with parchment paper.
  5. Dissolve the sugar in the warm water and set aside.
  6. Divide your dough into 8 equal pieces. Roll each piece out into a long rope that’s roughly 24 inches in length. (Don’t make it too long or your pretzels will be too thin.)
  7. Taking hold of the ends of the rope, cross the rope over itself to form a circle with about 4 to 5 inches on each end that are sticking out. Twist the ends over themselves and secure each end on either side of the pretzel.
  8. Carefully dip the pretzel in the water and then place on a parchment-lined baking sheet. Repeat with the other pieces of dough.
  9. Sprinkle the pretzels with the kosher salt and let them rest for about 15 minutes.
  10. Put the pretzels in the oven for 6 minutes, then rotate the trays and bake for an additional 6 minutes. Keep an eye on the pretzels so that they don’t burn.
  11. Remove the pretzels from the oven and immediately brush them with the butter. Keep brushing them with butter until you’ve used it all.
  12. Serve the pretzels warm with plenty of mustard or another condiment of your choice.

Not a real post

I promise I’ll have a real live, legitimate post soon.  Really.  It’s just that I’ve been looking for a job and, you know, the economy is going down the toilet and I’m really easily distracted by articles that promise I can monetize my blog* and posts about what I should be doing with my resume, but not so distracted that I don’t still feel compelled to at least make an attempt to find a job, so the blog and baking have fallen by the wayside.  Which is sad and for two reasons.  One because both are my favorite things to do and two because I have both a Daring Bakers challenge and two Tuesdays with Dorie due (yes, I am a hopeless joiner).  Really, I’m so far behind I don’t know if I’ll ever catch up.  Maybe there’s something on the Internet I can read about panic attacks…

Anyway, I was checking my email compulsively (like you do) and I had a bit of spam.  I’m always curious what Gmail comes up with for ads in the spam folder and here you’ll have to forgive me.  I’m not an “early adopter.”  I just started blogging, I just started using Gmail – you’d think I’d just discovered that there was a magical way to talk to other people on your computer a few weeks ago.  So when I was cleaning out my “spam” and saw an ad for

SPAM SWISS PIE

I had to click on it.  Spam Swiss Pie?  Do the Swiss know what Spam is?  Maybe everyone does and I’m just clueless.  Anyway, because I don’t have anything else to post, here is the recipe I was treated to for my index finger full of effort.

*  Exported from  MasterCook  *

                               SPAM SWISS PIE

 Recipe By     :
 Serving Size  : 6    Preparation Time :0:00
 Categories    : Pies                             Main dish

   Amount  Measure       Ingredient -- Preparation Method
 --------  ------------  --------------------------------
    1                    Deep dish pie shell (9")
    6                    Eggs
    1       c            Whipping cream
    1/8     t            Pepper
    1       cn           SPAM Luncheon Meat, cubed
                         -(12 oz)
    1/4     c            Chopped onion
    2       c            Shredded Swiss cheese,
                         -divided

   Heat oven to 425'F. Bake pie shell 6-8 minutes. Reduce oven
   temperature to 350'F. In bowl, beat together eggs, whipping cream,
   and pepper. Stir in SPAM and onion. Sprinkle 1 cup cheese in pie
   shell. Pour egg mixture over cheese. Sprinkle remaining cheese over
   egg. Bake 45-55 minutes or until eggs are set.

I’m a little mortified that I’m about to say this, but it might be really good.  Especially if you’ve had a glass or two of box wine, which I’m certainly down with.  If you make…Spam Swiss Pie, will you please be sure to let me know how it turned out?

Cheers.

*Uh, how come WordPress’s spell checker doesn’t know the word “blog?”

Five minute bread?

Hey!  I’m back!

Apparently I was effected by the Presidential election a bit more than I anticipated (I don’t really get in to politics) because I’ve actually been thinking about the country (all in all, not a bad thing to do with one’s time) more than I’ve been thinking about baking since the election.

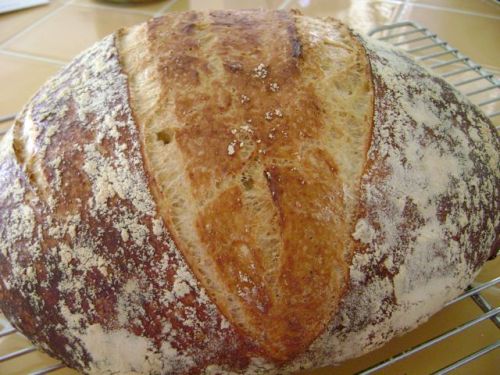
But, I did recently stumble upon a book called “Artisan Bread In Five Minutes” by Jeff Hertzberg and Zoe Francois – how could I not be intrigued?  Artisan bread?  That means yummy.  Five minutes?  That means easy.  I immediately put the book on hold at the library (the budget and extra space around here don’t allow for new books that haven’t been test-driven) and I’m number 22 on the hold list!  There was no way that I was going to be able to wait around that long to try out something that sounded so promising.  Thank god for Al Gore.  I poked around and found an excerpted recipe for the basic white loaf and

5-minute-bread-0

Not bad looking!  This is the second loaf I made from the original dough, and I did need to make some modifications.  I’ll make a more complete review once I’ve actually got the book in my hot little hands, but for now, I’m going to have a snack.

Cheers.

Gotta gotta have it

What could be better than a post that both links to a fine blogger and also writes itself because it’s just a point to a fine blogger? Good bar of chocolate maybe. Marrying your best friend. Sunday dinner and a new recipe. Ok, a few things, but it’s still pretty damn cool and anyway, I digress. This post is about something else…

Namely, cool stuff you might need, all compiled into a nice list (with pictures!) courtesy of Lynn at A Hot Dish. I love both the list (practical and useful with photos of the items and clear explanations of why you need them) and the blog name – I have no doubt that Lynn is a hot dish herself as well as being able to make a casserole that will both kick your ass (in a gentle comfort food kind of way) and make you weep from homesickness.

The only thing I see missing is a potato ricer, but that’s just because I’m crazy for gnocchi. How about you? Anything you’d want to add to Lynn’s list? It’s almost Christmas…

I noticed recently that several of the people I “know” online are wearing sweaters and scarves in their avatars and photos.  I live in Los Angeles.  It was 97 degrees on Tuesday, October 28.  That’s three days before November.  Seeing people in photos all bundled up makes me think “how can they wear that in this heat?”

The lack of seasons here is disorienting.  I’m not ever really sure what time of year it is.  A friend yesterday said “I can’t believe you’re 40!” (and honestly, neither can I) and I said “I can’t believe you’re 40!” and she said (this is getting ridiculous) “I’m 41!”  And I had to think for a second and remembered, oh yes, it’s October, her birthday was a few months ago.

I think one of the reasons it is hard to believe that I’m 40 is that I’ve spent the last four years here.  I was 36 when I came here, still in my mid-30s.  Now I’m in my 40s, but the weather has made it seem like we’ve just been sort of living 2004 for…a very extended period of time.  Those moments I remember that four years have passed I find myself sort of surprised.

I’m not complaining, exactly.  It’s nice to have sandal weather when the rest of the Northern Hemisphere is covered in snow.  And being in Los Angeles has been incredibly productive for us.  But there is something kind of…stunting about eternal sunshine.  Something that kind of holds you in the same place, even as you move forward.  If the seasons never really change, how do you know that time is passing?

Did someone say “pizza”…again?

I love pizza.  Who doesn’t?  Weird kids maybe.  Anyway, I love it because it’s really tasty and easy to make and cheap.  In fact, I love it so much that I already posted about it and not too long ago.  Which might make you think “well, I can skip this post” but you’d miss out because our illustrious host Rosa from Rosa’s Yummy Yums* gave us a dough recipe far superior to the one I posted previously.  And as we were required to make two pizzas for this challenge, the creativity of limitation pressed me to find possibly the cheapest ingredient ever to top a pizza.  Curious?  Read on…

The recipe for this pizza dough comes from The Bread Baker’s Apprentice by Peter Reinhart and is a bit more fussy than what I’d normally do – here at BLAN (wow, not the best acronym – should have been more thoughtful about the blog name) we’re all about simplicity, but will bend to fussiness when it serves the outcome.  This pizza is most definitely worth the extra bit of work that it requires.

Enough!  Let’s get to it.

I used plain old unbleached flour (I’ve never used high-gluten flour – I can’t even find it at our over-priced fancy-pants grocery Gelson’s) and it worked quite fantastically.  I also used dry-active yeast instead of instant (which I’ve also never used) and increased the amount by 25% (which seems to work every time).

Everyone into the pool!
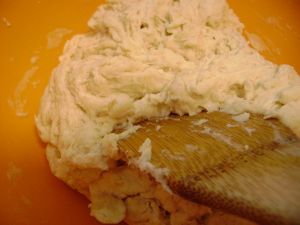
Almost the ingredients went into a mixing bowl and got the paddle treatment.  You could also use an electric stand mixer for this – which would in some ways be easier (“easier = better,” one of the core BLAN mottoes).  But our apartment is small, and so am I; the stand mixer sits on top of the fridge and weighs at least five hundred pounds – without the husband here to take it down, it’s not likely to get used.

Since I was a lazy-ass and didn’t get the stand mixer down, I was also obliged to knead the dough for five hundred years (5-7 minutes).
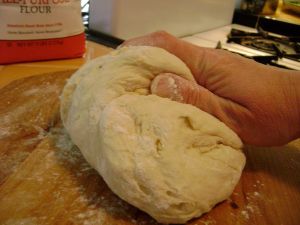
Maybe the kneading will make me strong enough to handle the mixer.  At any rate, once that was done, jelly pans were lined with parchment paper, dough dividing happened, rolling piece into balls ensued and the end result
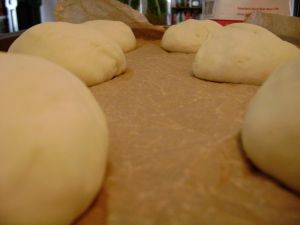
little balls of future pizza!  Gorgeous.

The balls were floured and misted with oil and wrapped in a ridiculous plastic wrap cocoon (note to self – don’t ever think it’s a good idea to buy the cheap plastic wrap).  The tray was then put into the fridge overnight.

Okay – a couple of things here.

1. Normally I would have a lot more pictures – almost too many.  But I got this idea in my head that this challenge would be a great opportunity for me to add some video to the blog (part of the challenge was to have a video or picture of yourself throwing the pizza, so it made sense, right?).  Oh how I underestimate the effort of things.  I am still planning on adding video to the blog, but when that does happen, it will be for a much less ambitious project and will be of something that I already forking know how to do!  Sometimes I just have no sense.  Anyway, the video took up so much time that I didn’t get very many photos.

2. As I just mentioned, there should be a video or photo of me tossing my pizzas.  And I tried.  I really did.  The pizzas turned out great but both of them immediately thinned out so much in the middle that tossing them was out of the question.  It was a miracle that they could be arranged on the peel at all and hold sauce.  But oh what a miracle they were…

The dough had a sleep overnight in the fridge.  It was removed two hours before baking and I set to work on the toppings.  For pizza one, red sauce, artichoke hearts and sun dried tomatoes with Parmesan cheese.

This one is a bit of a cheat, since we’ve done it before and knew it would be delicious.  But with the untested dough, I wanted to be sure we could rely on at least one of the pizzas to be edible (a girl does have to eat).

For pizza two…well, I was at a bit of a loss.  We’re pretty cheap around here and I’m a bit lazy, so I didn’t want to go to the store again and spend more money.  Besides, we had a half bag of potatoes threatening to go off so…
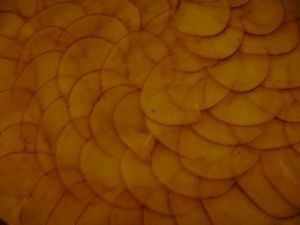
Heck yeah I did!  I made potato pizza – and it was amazing.  I mean really amazing.  The potatoes need to be sliced super duper thin (I used a mandoline and you could see through the slices).  The upside is that the whole pizza only required one small potato (although I have no idea what I’m going to do with the rest of them) and a small amount of salt, chopped rosemary and a bit of olive oil.  That’s cheap!
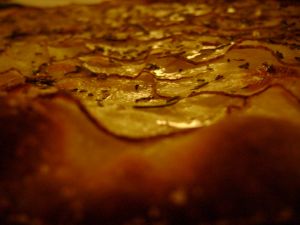
This challenge was so much fun.  This dough recipe will be our new staple for pizza – the crust was so thin it was unbelievable, and that’s how we like it.  I’ll be playing with it in the coming weeks (we eat pizza at least every other week) and doing what damage I can by adding wild yeast.  Heck, I might even go out and get some high gluten flour…if I ever run out of potatoes.

For more info on The Daring Bakers, visit www.thedaringbakers.com.

Basic Pizza Dough

Original recipe taken from The Bread Baker’s Apprentice by Peter Reinhart.

Makes 6 pizza crust (about 9-12 inches/23-30 cm in diameter)

Ingredients:
4 1/2 Cups (20 1/4 ounces/607.5 g) Unbleached high-gluten (14%) bread flour or all purpose flour, chilled
1 3/4 Tsp Salt
1 Tsp Instant Yeast
1/4 Cup (2 ounces/420g or 420 ml) Olive oil or Vegetable Oil (optional but better with!)
1 3/4 Cups (14ounces/420 g or 420 ml) Water, ice cold (40F/4.5C)
1 Tb sugar
Semolina/durum flour or cornmeal for dusting

DAY ONE

Method:
1. Mix together the flour, salt and instant yeast in a big bowl (or in the bowl of your stand mixer).

2. Add the oil, sugar and cold water and mix well (with the help of a large wooden spoon or with the paddle attachment on low speed) in order to form a sticky ball of dough.  On a clean surface, knead for about 5-7 minutes, until the dough is smooth and the ingredients are homogeneously distributed.  If it is too wet, add a little flour (not too much!) and if it is too dry, add 1 or 2 teaspoons extra water.  NOTE: If you are using an electric mixer, switch to the dough hook and mix on medium speed for the same amount of time.The dough should clear the sides of the bowl but stick to the bottom of the bowl. If the dough is too wet, sprinkle in a little more flour, so that it clears the sides. If, on the contrary, it clears the bottom of the bowl, dribble in a teaspoon or two of cold water. The finished dough should be springy, elastic, and sticky, not just tacky, and register 50-55F/10-13C.

3. Flour a work surface or counter.  Line a jelly pan with baking/parchment paper.  Lightly oil the paper.

4. With the help of a metal or plastic dough scraper, cut the dough into 6 equal pieces (or larger if you want to make larger pizzas).

5. Sprinkle some flour over the dough.  Make sure your hands are dry and then flour them.  Gently round each piece into a ball.  NOTE: If the dough sticks to your hands, then dip your hands into the flour again.

6. Transfer the dough balls to the lined jelly pan and mist them generously with spray oil.  Slip the pan into plastic bag or enclose in plastic food wrap.

7. Put the pan into the refrigerator and let the dough rest overnight or for up to three days.  NOTE: You can store the dough balls in a zippered freezer bag if you want to save some of the dough for future baking.  In that case, pour some oil (a few tablespoons only) in a medium bowl and dip each dough ball into the oil, so that it is completly covered in oil.  Then put each ball into a separate bag.  Store the bags in the freezer for no longer than 3 months.  The day before you plan to make pizza, remember to transfer the dough balls from the freezer to the refrigerator.

8. On the day you plan to eat the pizza, exactly 2 hours before you make it, remove the desired number of dough balls from the refrigerator.  Dust the counter with flour and spray lightly with oil.  Place the dough balls on floured surface and sprinkle them with flour.  Dust your hands with flour and delicately press the dough into disks about 1/2 inch/1.3 cm thick and 5 inches/12.7 cm in diameter.  Sprinkle with flour and mist with oil.  Loosely cover the dough rounds with plastic wrap and then allow to rest fr 2 hours.

9. At least 45 minutes before making the pizza, place a baking stone on the lower third of the oven.  Preheat the oven as hot as possible (500F/260C).  NOTE: If you do not have a baking stone, use the back of a jelly pan.  Do not preheat the pan.

10. Generously sprinkle the back of a jelly pan (or your pizza peel) with semolina/durum flour or cornmeal.  Flour your hands (palms, backs and knuckles).  Take one piece of dough by lifting it with a pastry scraper.  Lay the dough across your fists in a very delicate way and carefully stretch it by bouncing it in a circular motion on your hands and by giving it a little stretch with each bounce.  Once the dough has expanded outward, move to a full toss.  NOTE: Make only one pizza at a time.  During the tossing process, if the dough tends to stick to your hands, lay it down on the floured counter and reflour your hands, then continue tossing and shaping.  If tossing is impossible, you can let it relax for 5-20 minutes.  You can also use a rolling pin but it is not as effective (or as fun!) as tossing.

11. When the dough has the shape you want (about 9-12 inches/23-30 in diameter for a 6 ounce/180 g piece of dough) place it on the back of the jelly pan (or peel), making sure there is enough semolina/durum flour or cornmeal to allow it to slide and not stick to the pan.

12. Lightly top it with the sweet or savory toppings of your choice.  NOTE: Remember that the best pizzas are topped not too generously.  No more than 3 or 4 toppings (including sauce and cheese) are sufficient.

13. Slide the topped pizza onto the stone in the oven or bake directly on the jelly pan.  Close the door and bake for about 5-8 minutes.  NOTE: After 2 minutes baking, take a peek.  For even baking, rotate 180 degrees.  If the top gets done before the bottom, you will need to move the stone or jelly pan to a lower shelf before the next round.  If the bottom crisps before the cheese caramelizes you will need to raise the stone or jelly.

14. Take the pizza out of the oven and transfer it to a cutting board or your plate.  In order to allow the cheese to set a little, wait 3-5 minutes before slicing or serving.

NOTE ON SAUCE: Your sauce should not be too thick as it will thicken in the hot oven.  Less is more but make the less truly more by using quality ingredients.

Cheers.

*Rosa’s co-hosts for this challenge were to have been Sherry Cermak from What Did You Eat? and Glenna Muse at A Fridge Full Of Food.  Sadly, Sher (as she was fondly known) passed away suddenly a few of months ago.  I never knew her but have been fortunate enough to visit her blog and she was clearly loved and clearly is missed.  Rosa’s other partner in hosting, Glenna, has decided to bow out of DB for now.  I wanted to mention that Rosa did an amazing job of hosting unexpectedly by herself and love the fact that she decided to honor Sher by keeping the original challenge they had discussed.  Many thanks Rosa – well done!

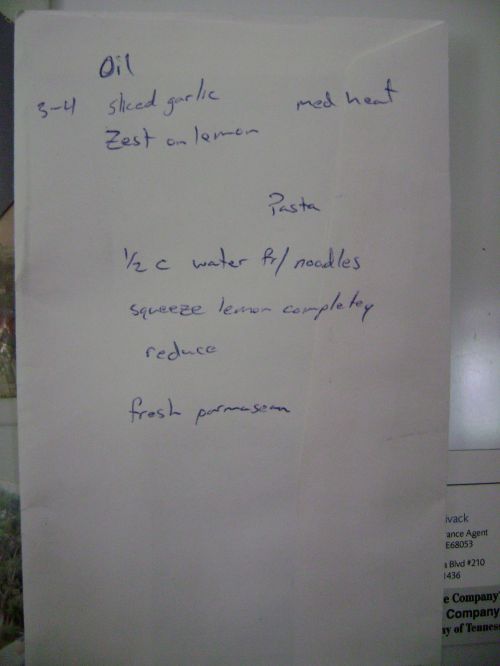
I just got back from my walk about and stopped at the fridge (after plowing down an ample helping of last night’s leftovers standing right there in the middle of the kitchen) and noticed this list on an envelope, magneted (is that a word?) to the fridge door:

This is what it says:

Oil
3-4 sliced garlic

Zest on lemon
med heat
Pasta
1/2 cup water fr/noodles
squeeze lemon completely
reduce

fresh Parmesan

I looked at it for a few seconds and thought “that sounds great – we should try that!” and then realized that not everyone would know that the list is really a recipe (cook the sliced garlic in oil, cook pasta in salted water, drain, reserve 1/2 cup of the pasta water, add to the oil and garlic, add the juice of one lemon and the zest, reduce sauce, toss with pasta and serve with grated Parmesan cheese).

All that to say, every once in a while I’m reminded that as much as I don’t know what I’m doing (which is what makes cooking a fun adventure), I also do know what I’m doing.

Have faith in your ability.  You know more than you know.